Dynamic Setup With Minimal Equipment

People often assume that dynamic images are created with a complex list of equipment. I’ll show you how I accomplished this image with just 2 lights and a fill card.

What you see vs. what it actually takes 📸

Here's what went into a "simple" product photo:

The lighting setup 💡
A large roll of diffusion with a light blasting through it for my key light. This creates the nice highlight on the right side of the product. The light above the diffusion has a gobo on it, which allows me to create a beaming effect. By adding this into the shot, it creates a punchy shadow and guides the viewer where to look. Lastly, I have a foam board as a fill on the left side of the product. Without this, the product's text becomes difficult to read and the highlight to shadow ratio is just too intense.

The water surface💧
An acrylic tray filled with water and a mauve colored sheet of paper underneath helps bring some color into the frame. I'm using a rocket blower on the water between every frame to create the organic ripple patterns. I do have a small piece of wax that's holding the product down to the base of the tray - the moving water would shift the product around if it wasn't anchored down.

The overhead angle 📐
Camera mounted on a c-stand arm directly above the product with a Matthews Junior Ballhead adapter paired with my tripod head. By putting the camera directly overhead, you avoid staring at the bottom of the product, and the text appears nice and legible.

Tethered shooting 🖥️
Every frame went straight to the laptop so we can evaluate color, shadow, sharpness, and ripple placement in real time. I always push to shoot tethered because being able to zoom in, crop, apply adjustments, and even overlay designs to ensure we're creating assets that work for you across every platform.

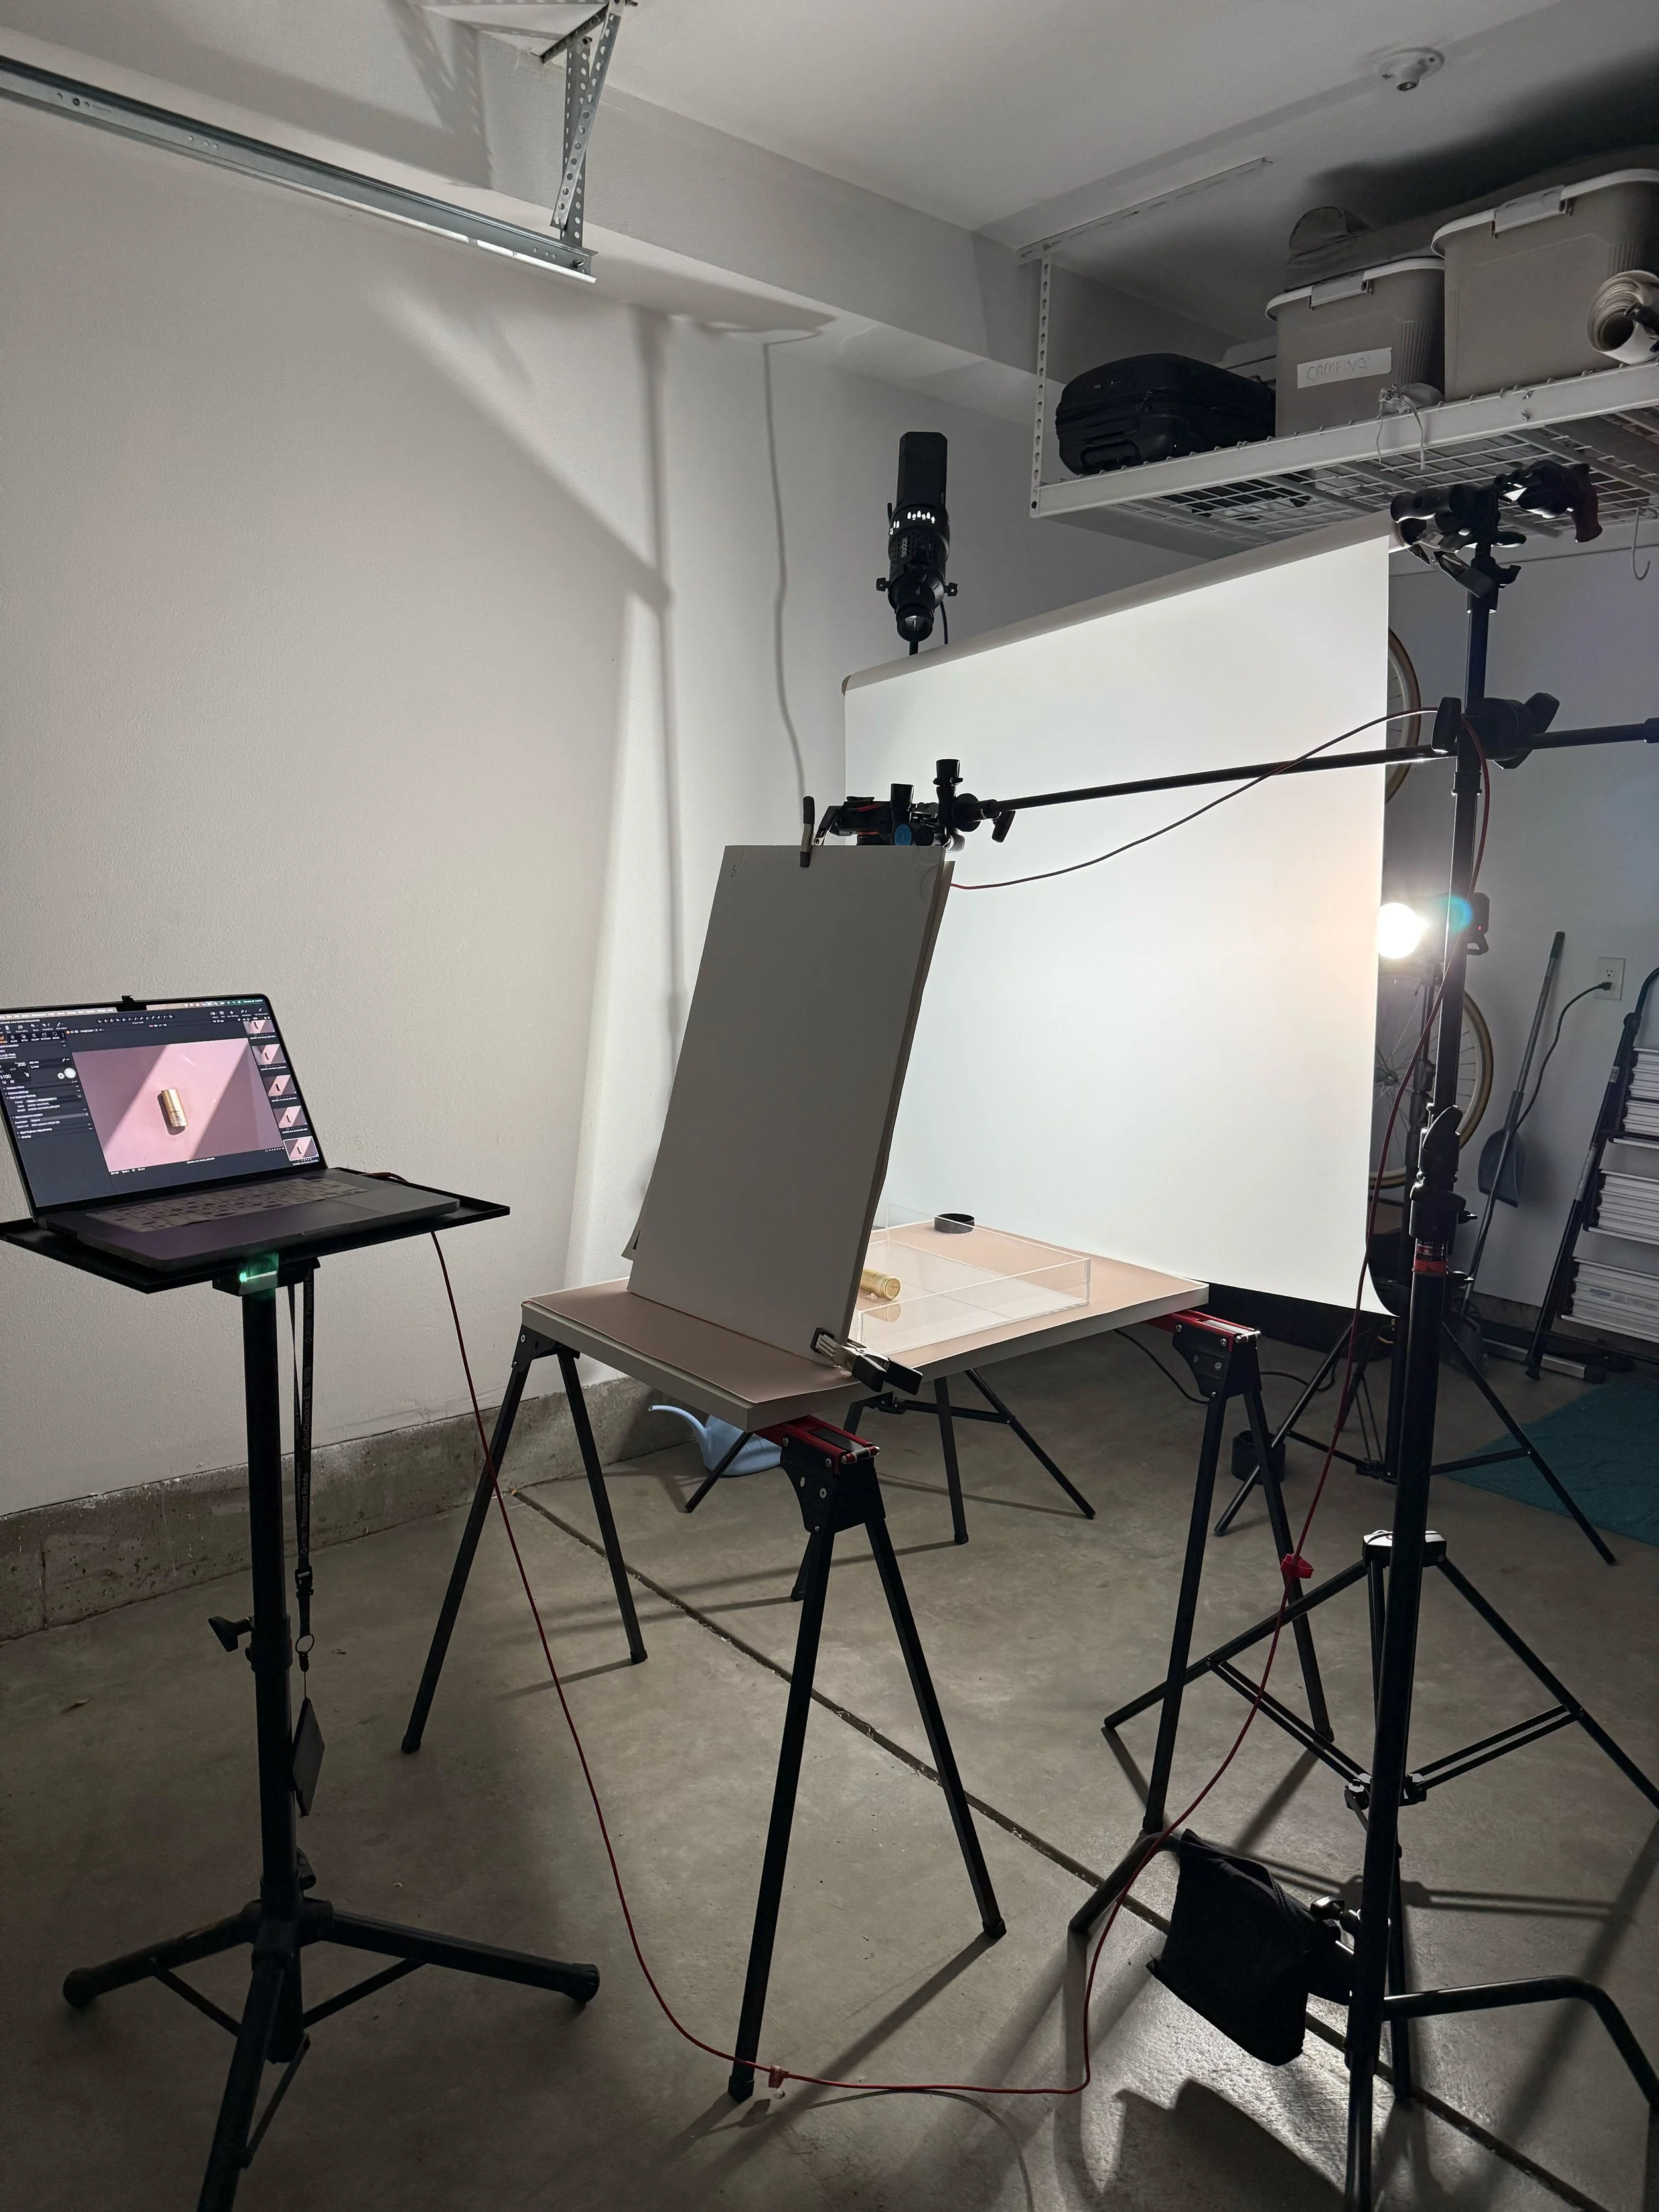
BTS image of the setup
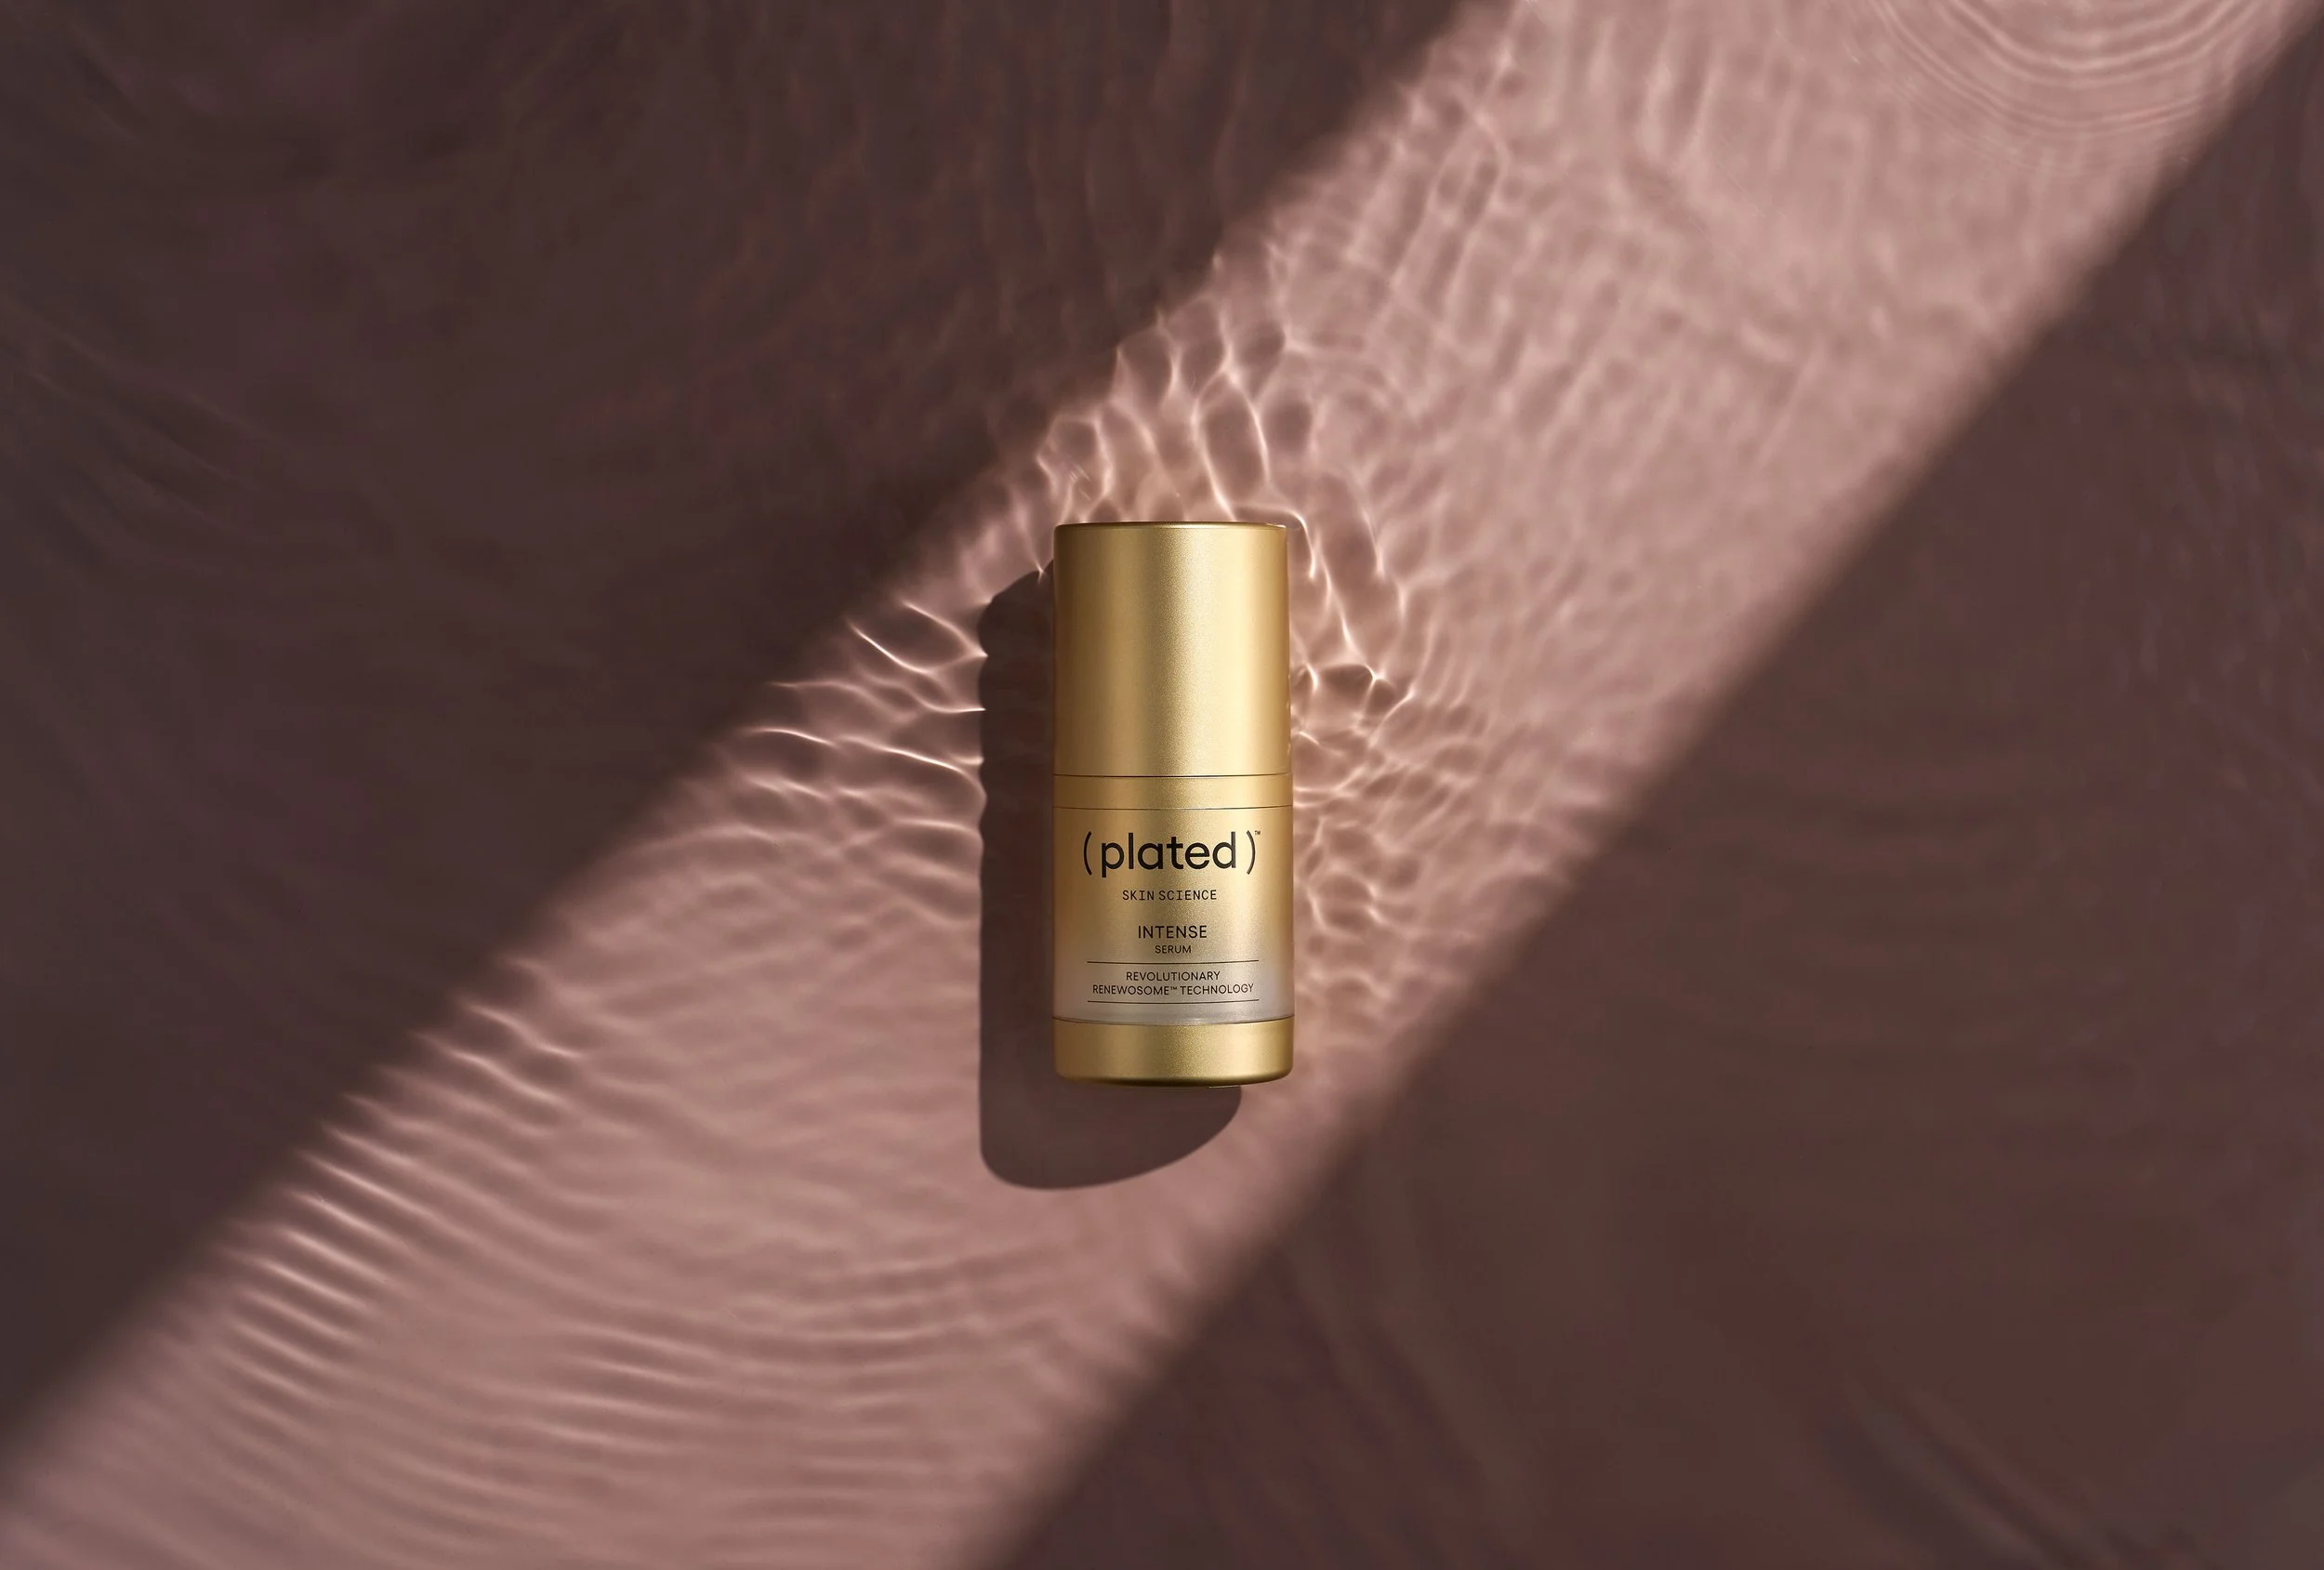
Final image

Product Lighting Breakdown

Lighting Breakdown: How to Create Clean, Dynamic Product Images

Ever wondered how those crisp, polished product images come to life? Maybe you’ve set up your lights and dialed in your settings, but something still feels off — the reflections aren’t right, the highlights are harsh, or the image just lacks that punch you saw online.

Let’s fix that.

In this lighting breakdown, I’ll walk you through a step-by-step setup that creates a dynamic, yet repeatable look you can use across a wide range of product shoots. It’s all about understanding how light behaves — and how to shape it intentionally.

The Setup: Two Lights, Two Purposes

I’m using two lights here, each with a distinct role.

Key Light: My main light source is a Godox AD600 Pro modified with a 7-inch silver reflector. This is a relatively small modifier, which creates a more focused, specular highlight. The silver lining inside the reflector boosts contrast and adds a punchy, hard quality to the light — perfect if you’re aiming for a bold, high-impact look. If you’re going for texture and want to emphasize the shape and sheen of your product, this modifier does a great job.

AD600pro on 1/8 +.5 power

Fill Light:For the fill, I’m using another AD600 fitted with a strip box, which is then shot through a 4x4’ diffusion panel. The strip box itself includes both an internal and external white baffle, helping to soften and spread the light evenly. That extra layer of 4x4 diffusion gives the light a silky wrap and helps eliminate any distracting harsh reflections — especially important if you’re photographing reflective or glossy surfaces. It also introduces a beautiful, clean edge to your highlights without overpowering your key.

AD600pro on 1/16 power

Final Thoughts:
I thought by adding in each frame, you can clearly see the properties of what each type of light is producing. The key/specular light provides direction, contrast and texture. It helps highlight the water beaded up on the can and provides a “fresh” feel. The fill/diffused light helps showcase texture in a different way. It shows the metallic property of the can, and without a large diffused source, you’ll miss that key feature.

The key to building compelling product imagery is consistency — not just in lighting, but in how you think about shaping light. By understanding how hard and soft light interact, and where to place your modifiers for the most flattering result, you can turn a simple product into something scroll-stopping.

Here’s the finished, fully retouched image.

Sony A7RV + Sony 28-70mm ƒ/2 GM shot @ 70mm

1/640 - ƒ/5.6 - ISO 200

Have questions or want to see a visual breakdown? Drop a comment or shoot me a message — I’m always happy to help fellow creatives level up.